
After seeing a few vertical gardens on Pinterest, I have been very interested in creating my own vertical garden at home. I came across a few of these planters that were affordable for home use purposes. Mind you, they get quite pricey if you have a bigger wall space to cover.The two that I settled on was the Woolly Pocket and the Flora Felt vertical planters. For now I have been testing out the mini Wally from Woolly Pocket for the past 3 months. Luckily, there was a local store here in Ottawa, that carried it so I did not have to pay the expensive shipping costs.
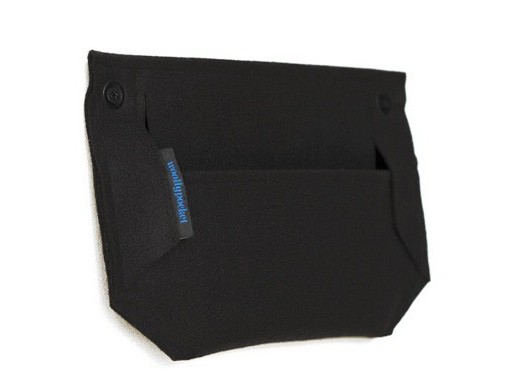
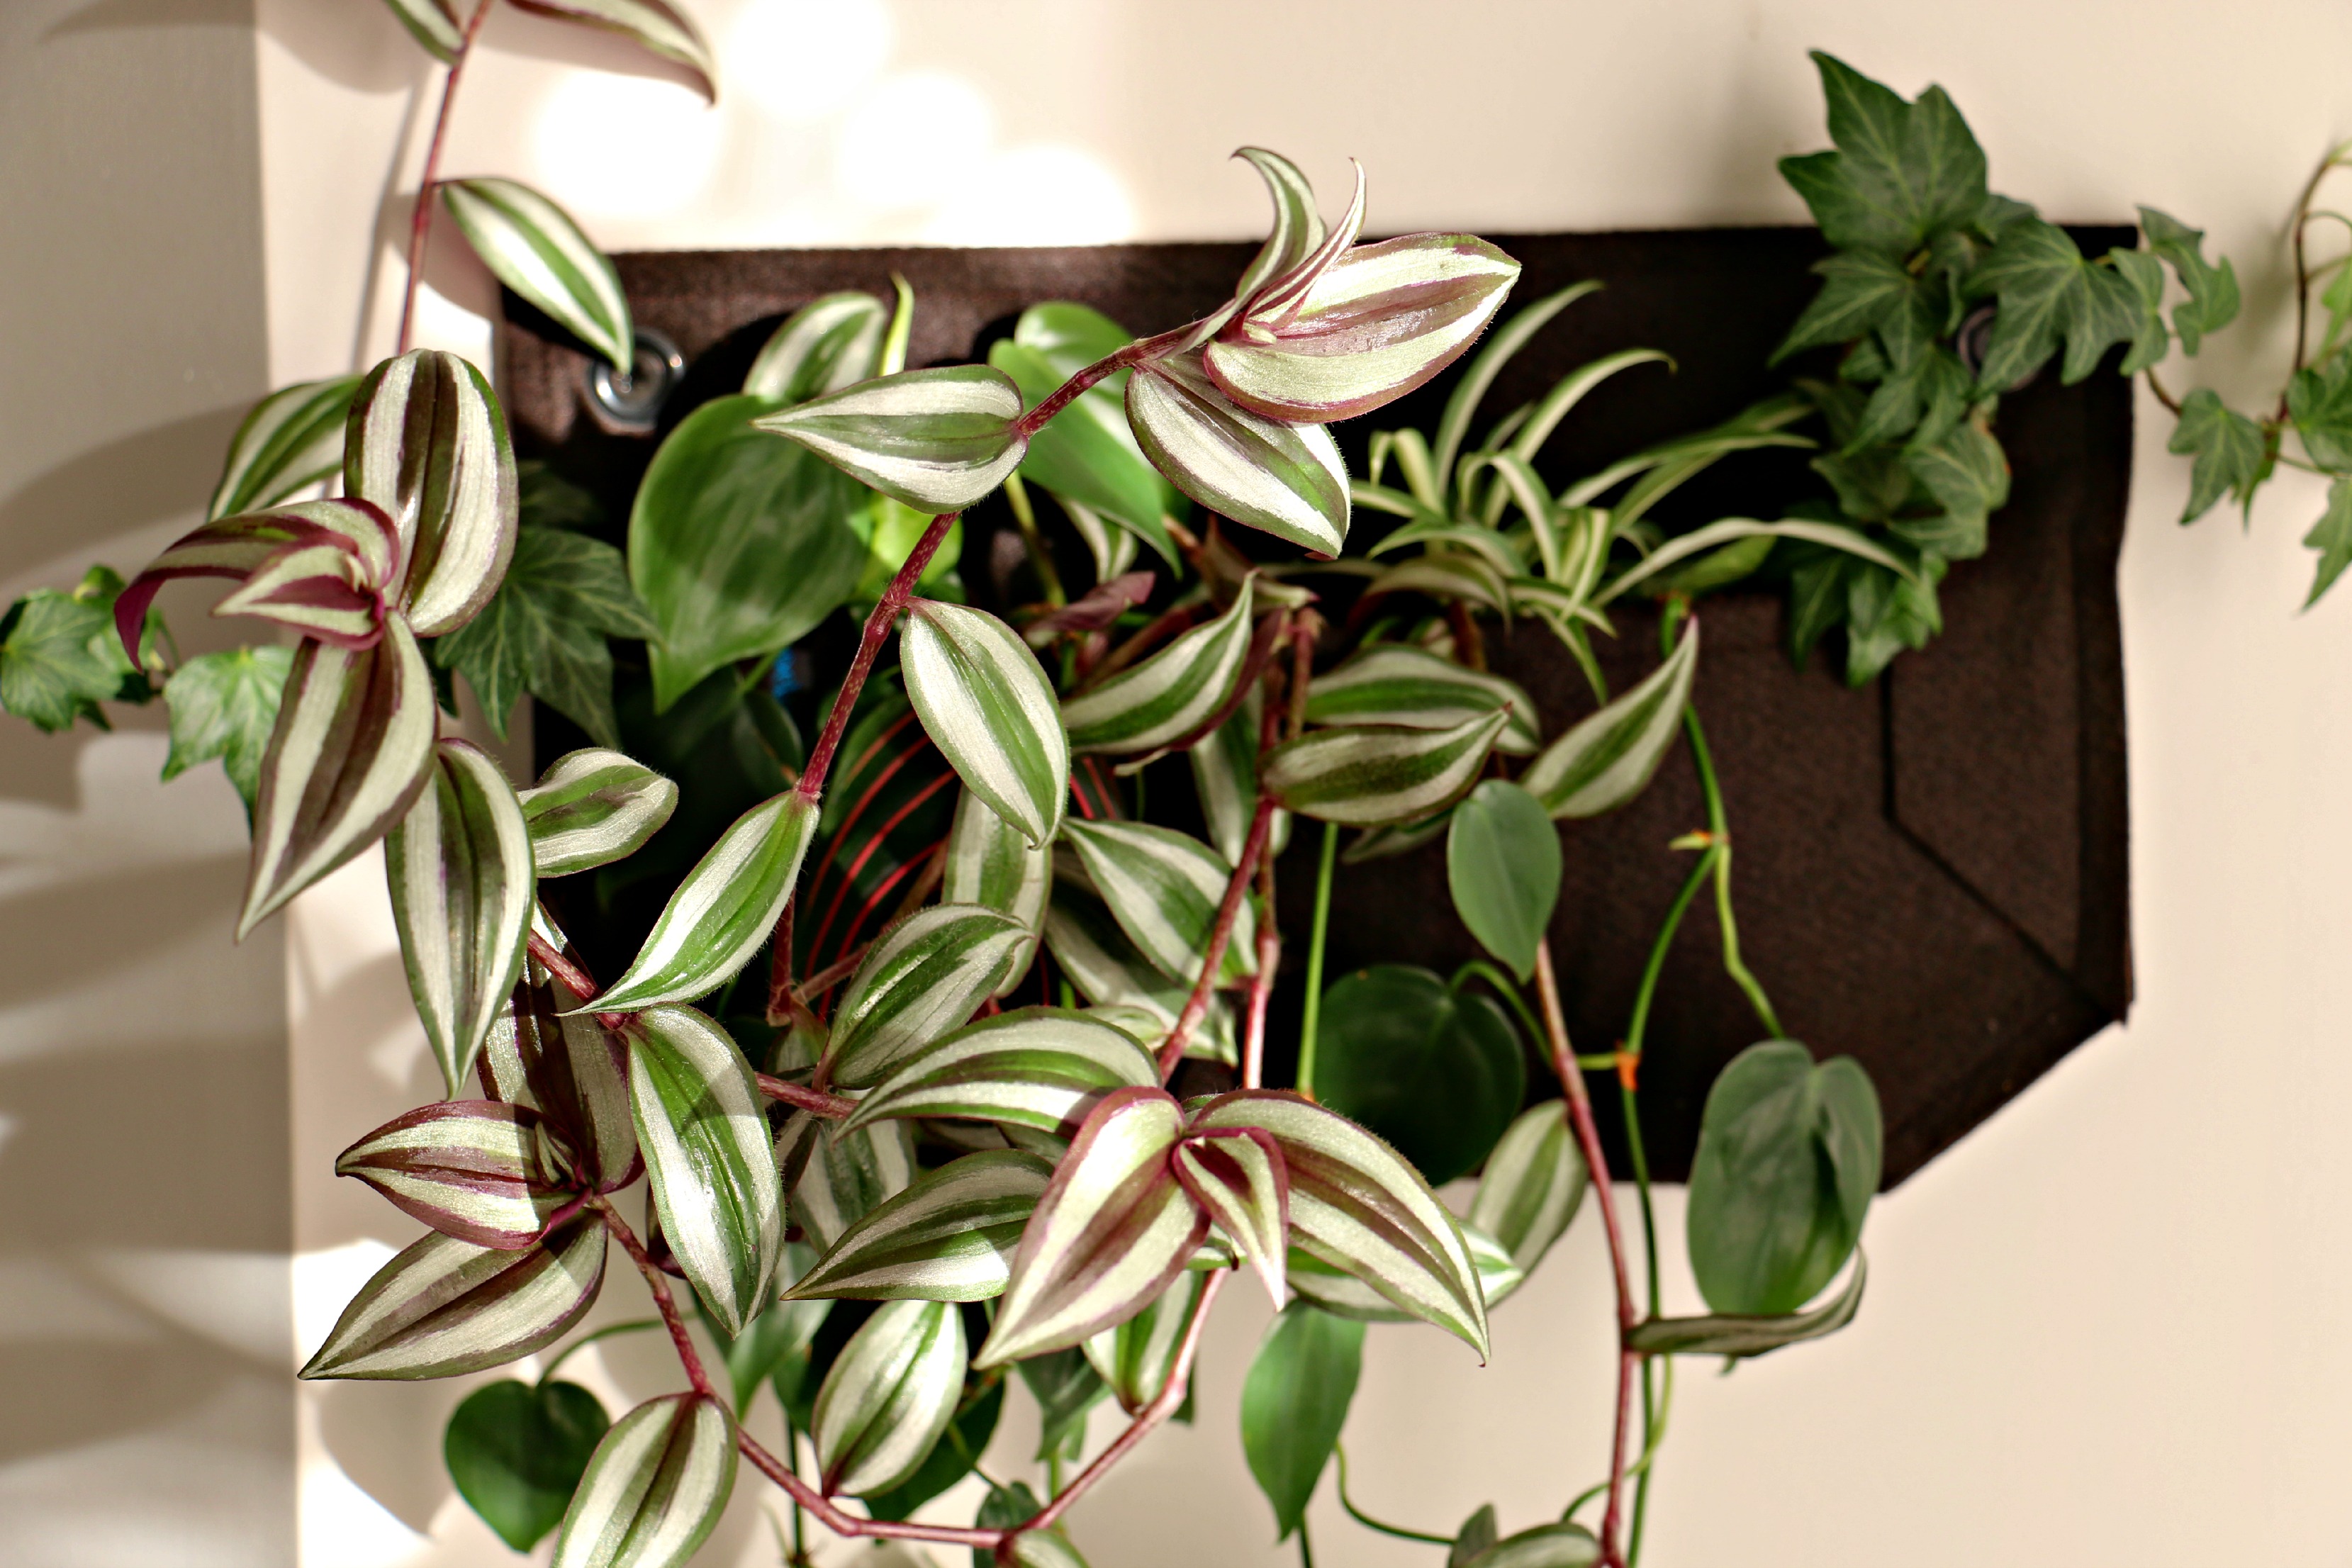
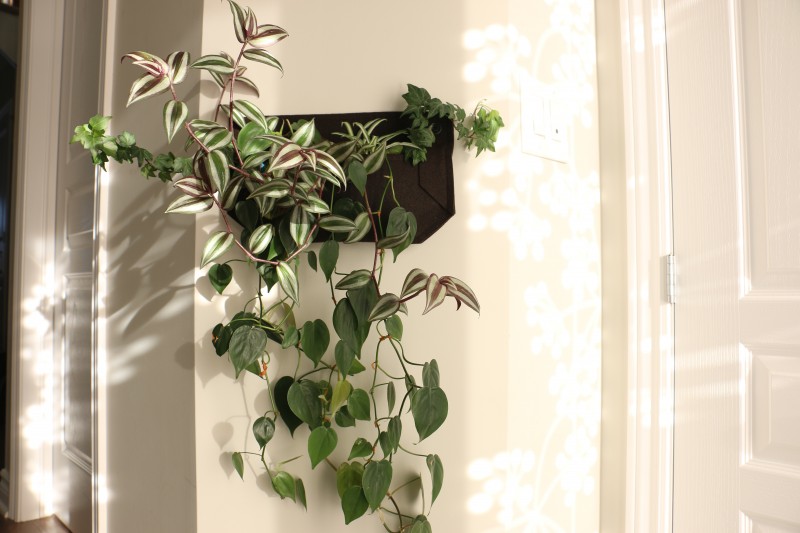
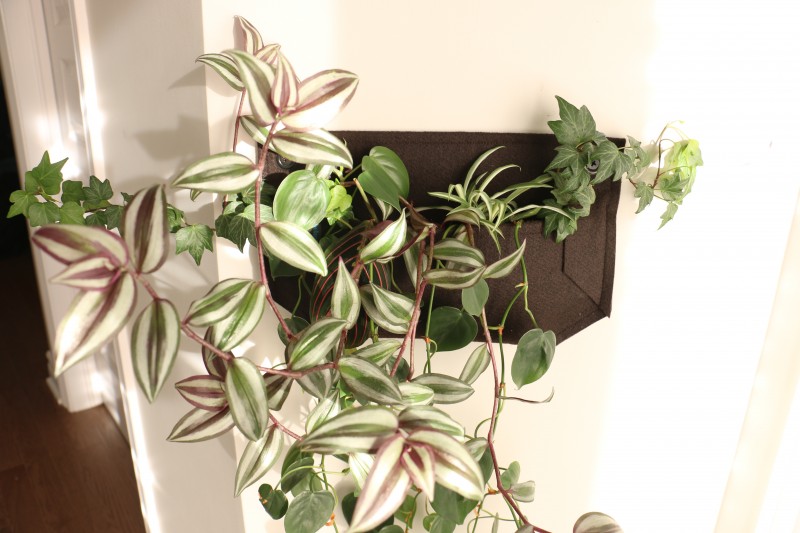
One of the things I love about this Woolly Pocket product is that they are made from 100% recyclable plastic bottles. How cool is that?! I purchased the mini Wally version as I figured it would be the perfect way to test this product as it was significantly cheaper than the full-sized version. The mini Wally is 20cmH x 33cmW and holds 0.10 cubic feet/3L of soil.
Where to hang
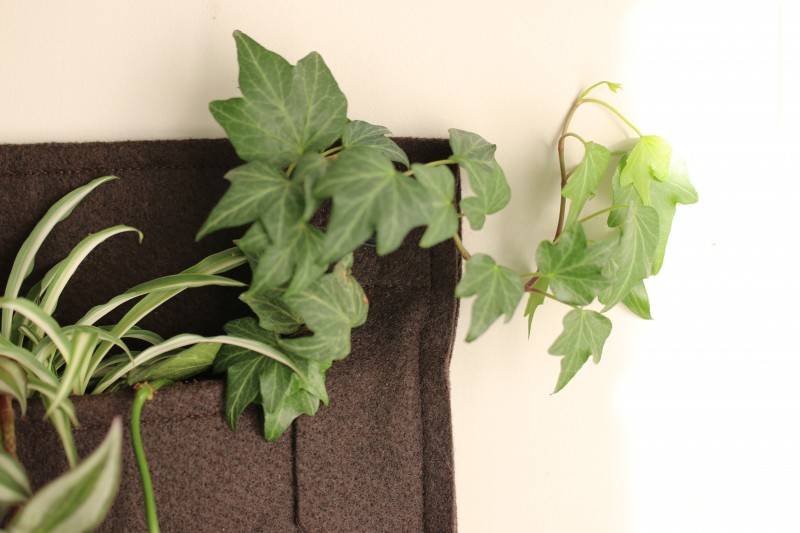
Consider the availability of light in the area you want to hang your planter. I decided to trial this planter at the entrance of my home. This part of the house gets afternoon sun so it was perfect for the plants I had in mind. What I did not think about was the cold draft these plants will experience in the winter time whenever the front door is opened. Yikes! I’m curious to see whether they will make it through winter. So be warned, choose where you will hang wisely because although you can relocate the planter, you will leave behind pretty sizeable holes in the walls.
How to hang
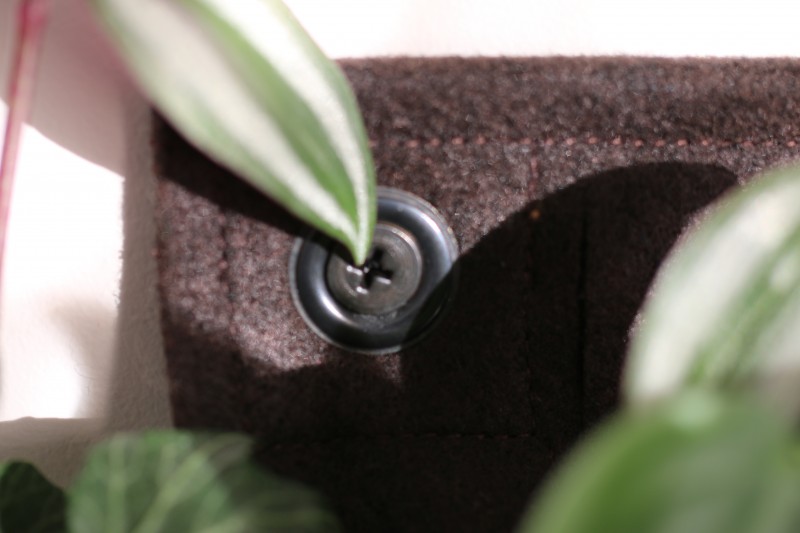
I didn’t take step by step pictures for the installation process because it really was unnecessary. The planter came with instructions and the fasteners needed to hang. The instructions were easy to follow and you can visit the company’s website for instructions as well. I started by measuring the distance between the grommets on the planter, drilling holes in the wall, placing the fasteners in the holes and then screwing the Wally into the holes. Once that was done, I filled the pocket with soil and placed my plants.
Plants to choose
The plants you choose will depend on the type of light in the space. The mini Wally is pretty small so you might be able to fit about 2-3 4 inch potted plants. Since this was a test, I decided to use cuttings of plants I had in the home. This allowed me to fit in more plants since I didn’t have a big root ball. I originally added some English Ivies and rooted cuttings of heart leaf philodendron. I later added a rooted cutting of a prayer plant, wandering jew and a rooted baby spider plant only recently. I probably should have added a few upright plants as well to give it a more fuller look.
Watering
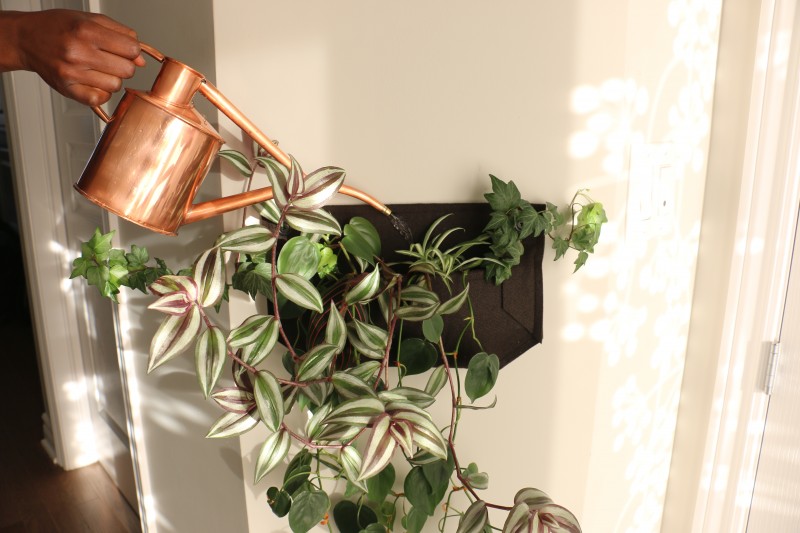
Now, how to water is KEY. Instead of watering directly onto the soil like you would for most planters, with the Wally planter, you water the tongue only. The tongue is the back panel of the planter as shown here on their site.The Tongue absorbs the water and transfers it down to the roots of the plant. It is easier to water this way by using a watering can with a long spout. Watering the soil directly causes water to drip from the breathable front section of the planter and let me assure you all the water you pour will quickly drip on the floor. Yes, it happened to me. If you water the tongue, you still have to be careful and water gently as if you over-water, the water will move to the front part of the planter and again drip to the ground. It sounds complicated but it really isn’t. Once you do it once or twice, you get the hang of it. Incase you were wondering, the wall where the planter is placed never gets wet – or at least has not happened yet. If you are going to use these products outdoors then you do not have to be as careful in watering.
The vertical planter will look even better when you have a few more stacked against each other to have a full vertical garden. I will be getting a few more minis for the front here to cover most of the wall if these survive the winter. Even if they don’t, I might still do it and have them as temporary plants for summer. We’ll see.
I will be testing the Flora Felt vertical planter next and will post about it in months to come so stay tuned.
Have any of you tried either of the two brands mentioned here or have any experience with similar products (for indoors)? If you have please comment and share your experiences.
![]()
***Edited November 18, 2015*** Enter Barbara2015 when shopping on woollypocket.com to get 20% off all Woolly Pocket products (excluding 4-pack of Living Wall Planter 2 (LWP2)). Promotion ends November 30, 2015.
Barbara
Hi, I’m Barbara and I’m a little obsessed with house plants. I share my house plant adventures in the hopes of inspiring you to continue to enjoy the greens in your home. And if you have no plants (yet!) I hope this blog inspires you to add some green to your home. So go on! Try it! I think you might quite like it. And who knows? You may end up being … obsessed too.
Wall planter
Thanks for your sharing.
13 . Feb . 2017Karen Tsang
Hi Barbara, did you end up trying the florafelt too? I am figuring out which one to go for and would be nice to know from someone who’s tried both.
Thanks!
Karen
13 . Jun . 2016Barbara
Hi Karen,
14 . Jun . 2016I didn’t try the flora felt. I was quite happy with this one.
Jennifer Sisco
I would try one or two of my larger trailing African Violets. It would be interesting to see how well they do in a planter like that
04 . Nov . 2015Mellisa
This is great! It was at the back of my mind the whole time I was reading whether the walls get wet! Thanks for clarifying 🙂
28 . Oct . 2015Barbara
Glad I could help 🙂
29 . Oct . 2015