

The last couple of months I have been spotting Himmeli structures all over Pinterest which really got me interested on how they are made. I attempted one a couple of months ago with drinking straws. You can sort of see it in a previous post here. It turned out pretty well for a first attempt. Since then, I’ve wanted to try my hands at more so when I decided to visit my sister in Toronto, I thought what better way to give her a gift of airplants than to give them in style.
I tried to find the link to the guide I used previously on my first attempt to post here but I couldn’t find it. Below I have attempted to create a guide on how to make your own airplant holder and I hope it is clear enough. If you are interested follow along. If not, just scroll down the end of the post to see how they turned out.
What You Need
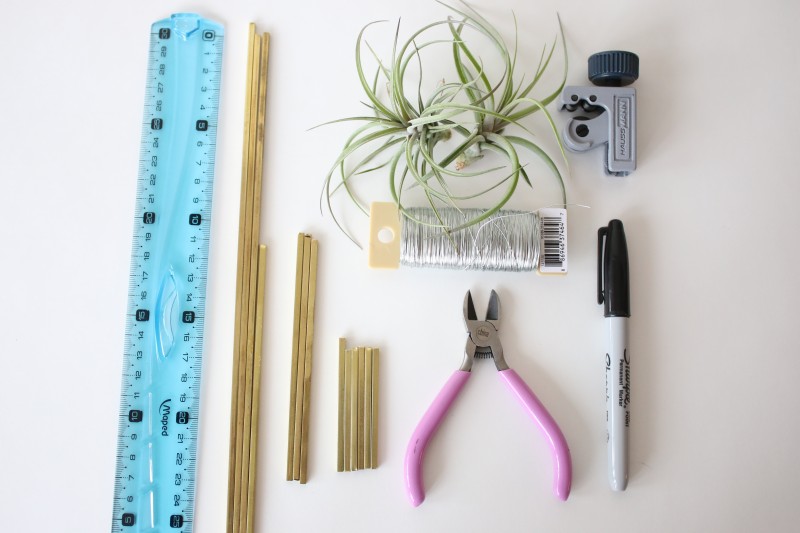
-brass tubes. I purchased 1/8″ D x 12″L tubes. You need 9 tubes/sides per sculpture so it worked out to about two 12inch tubes and a bit for each sculpture. You may need more depending on how big you want it.
-Mini Tube cuter
-Ruler/measuring tape
-Scissors/wire cutter (if using a wire)
-Wire, monofilament fishing line or yarn – The first one I made, I used a wire. I cant explain why but it was pretty hard to work with this. The second sculpture I tried to use yarn because it seemed like it would be easier. Unfortunately, the diameter of the tube was way too small and it was difficult getting a needle (which was 2 cm short of the length of the tube) through the tube every time (obviously didn’t think that one through). I finally settled on using a fishing line. It was so much easier because I could tie knots at the ends to keep the tubes from sliding all over the place (you will find out what I mean once you start working on it.)
-Airplant(s)
Steps
1. Cut your tubes
Decide how big you want your sculpture to be. I wanted the base of the sculpture to be a different size than from the top so I cut 6 tubes (which would be the base), 6 cm in length and three tubes 12 cm (the top) for the first sculpture. The second sculpture I did, I cut 6 tubes 6cm, 2 tubes 12cm and one piece 14 cm. I will explain why later on. Mark on your tubes the desired length with a sharpie and cut them with the mini tube cutter.
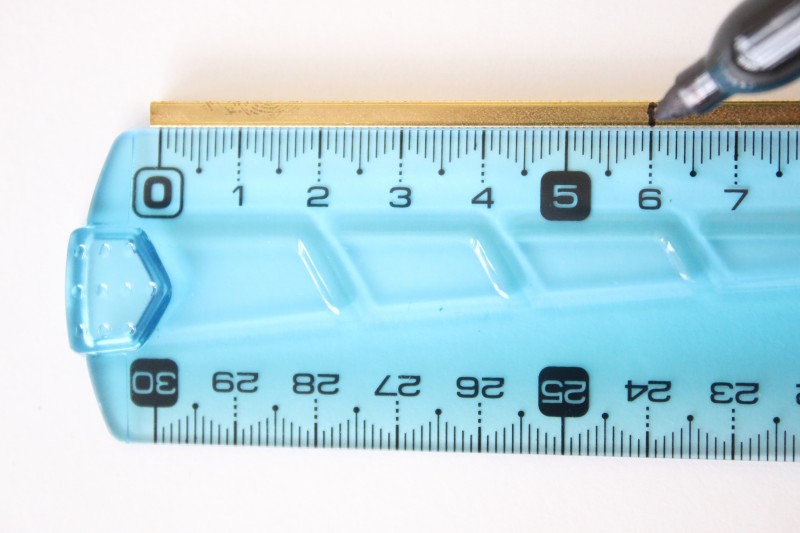
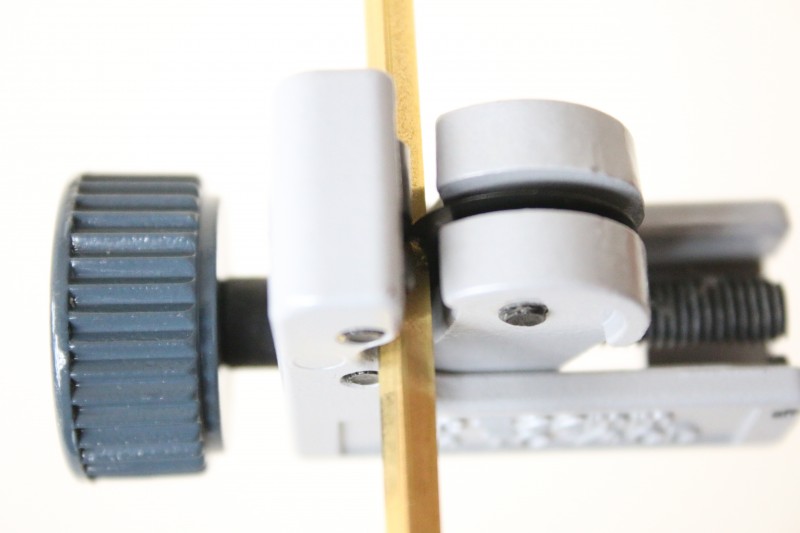
Since this was my first time using the mini tube cutter, it was a challenge but after I cut a couple of tubes, I got the hang of it. My tubes are square and not round, which made it harder to cut. Normally, once you place the tube in the cutter, you just tighten it using the knob and keep turning the cutter around until it cuts all the way through. There are videos on YouTube on how to use the mini cuter. Watching someone use it is so much better than trying to grasp how to use it from just reading. Because my tubes had straight edges, I couldn’t rotate the cutter so I would only cut through one side and then use my hands to break it off. This meant jagged edges but I was careful.
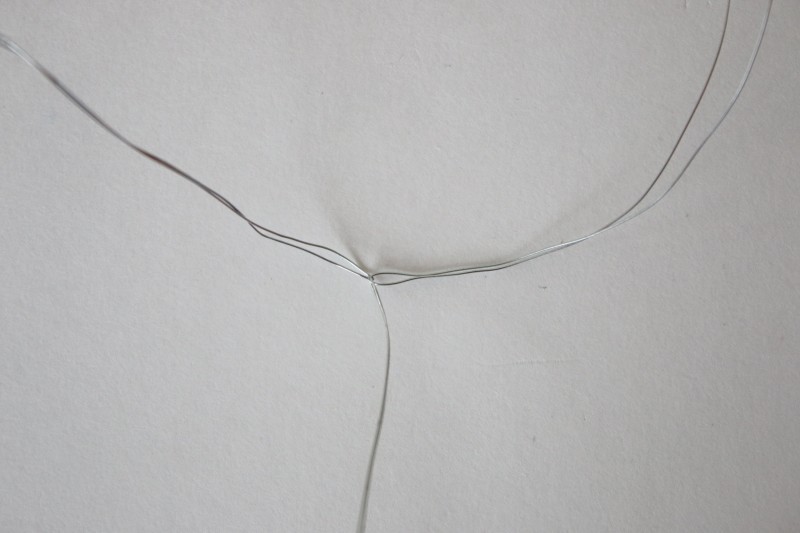
2. Cut your wire/yarn/twine/fishing line
Cut your fishing line so that you end up with three pieces that are at least more than three times the length of your tubes when you double them. You won’t need all that length but it will give you enough so you can make a knot at the end.
3. Loop all three Lines
Loop all three lines to make a knot in the middle like in the picture below.
4. Thread the lines through the tube
Once you’ve made the loop in the middle, separate each doubled up line so you have three sections. Then thread them each through the tubes. It should look like the picture below.
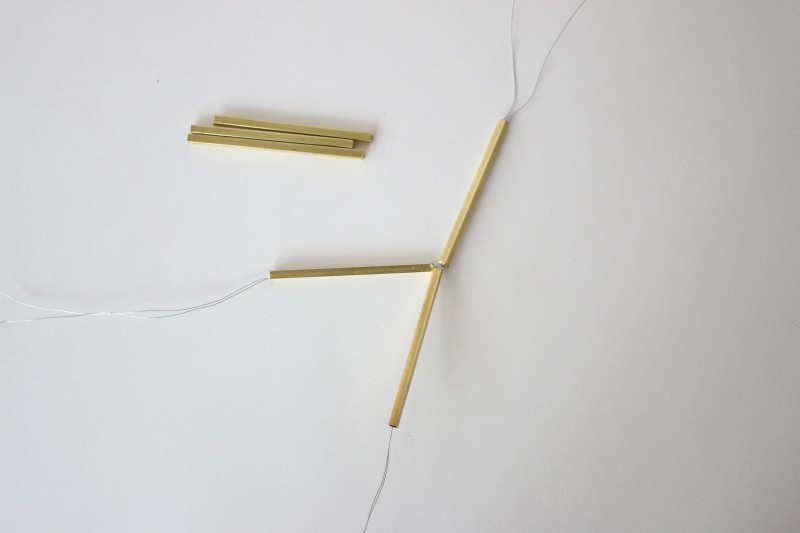
Now this is the tricky part. Separate the two lines coming out of each tube. Then take one of those lines and thread a tube through one end from left to right. Then take another line coming out of the nearest tube and pass it through that same tube through the right end to the left. It should look like the picture below.
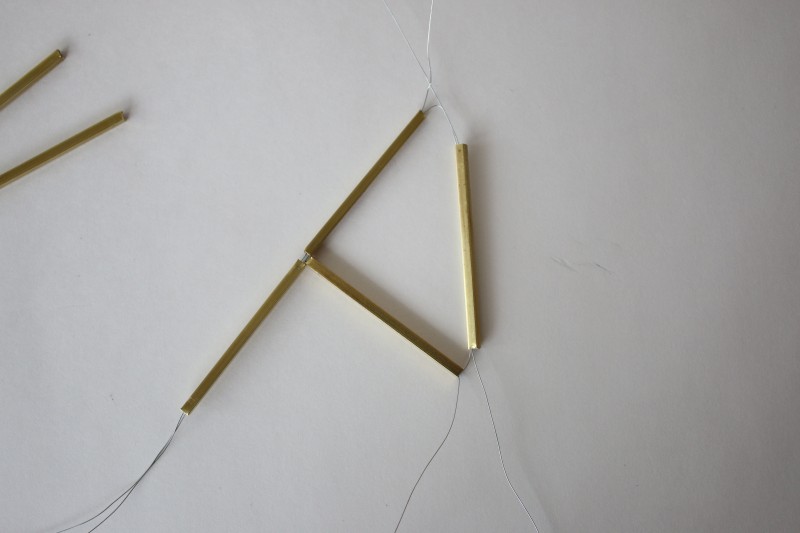
Repeat this step 2 more times so that you have 6 tubes threaded once done. Now pull the lines taut at the top and what will be the base of the sculpture will magically take shape. At this point I tie knots at each end of the lines to keep the base shape intact even when you let go of the lines. It should look like the picture below.
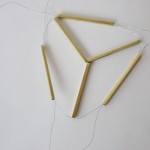
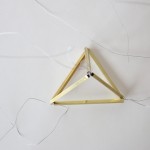

Now you should have 3 sets of two lines coming from each point of the base as pictured below. Simply thread the tree sets of lines with 3 tubes and this will for the top part of the sculpture. Tie a knot at the top and voila! Done. Place them on the wall with a nail and fill them with airplants of your choice.
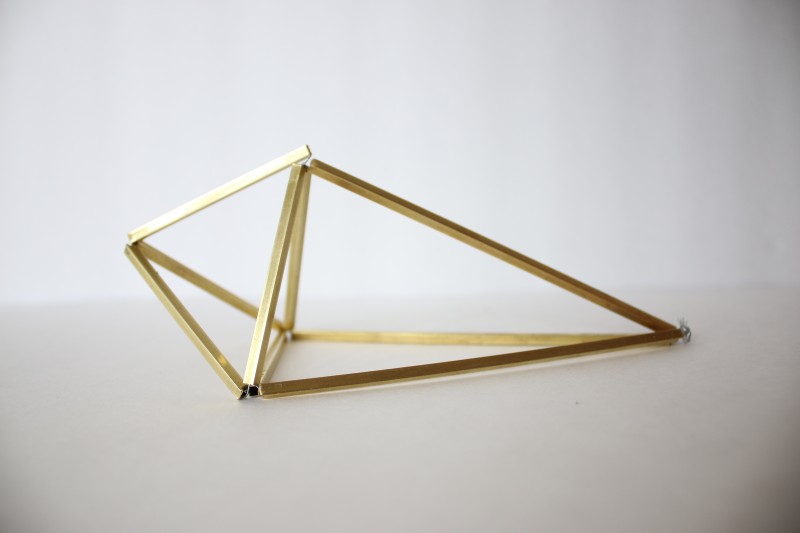
Now, I wanted to have these attached flat on a wall as wall scones instead of hanging down from the ceiling for example. With the first sculpture I made, I learned that having all the same length prevented all the parts from laying flat on the wall. Only the top or base of the sculpture would lay flat on the wall but not both. So with the second sculpture, the top part had 2 tubes of 12cm and 1 tube 14cm. How I came by that length of 14cm was from a rough estimate. I could have been more accurate and used Pythagorean theorem to figure it out but what can I say… didn’t want to do the math.In the end though it worked well.
This is how it looked on my wall.
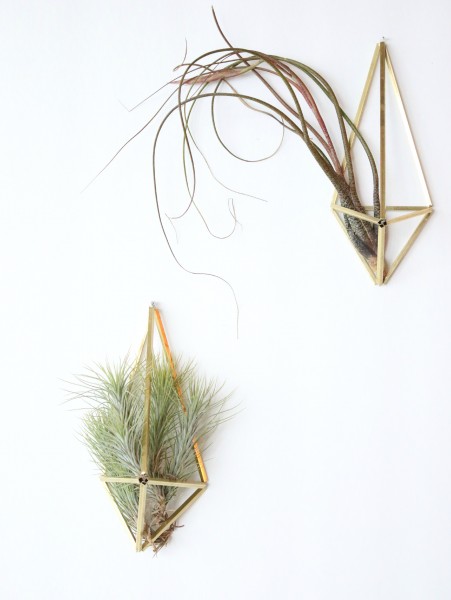
You can clearly see that the top Himmeli structure lies totally flat on the wall, while the bottom one has the top part of the structure lying flat on the wall while the bottom part lifts off. Go here if you would like tips on how to take care of air plants.
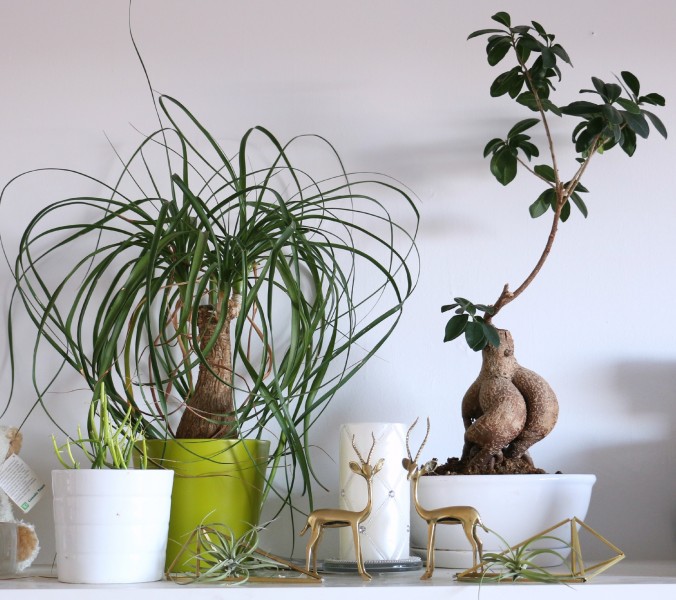
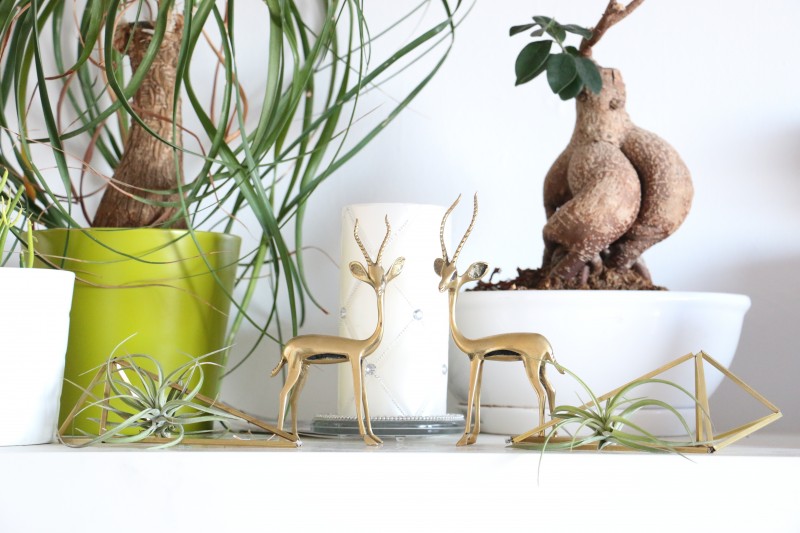
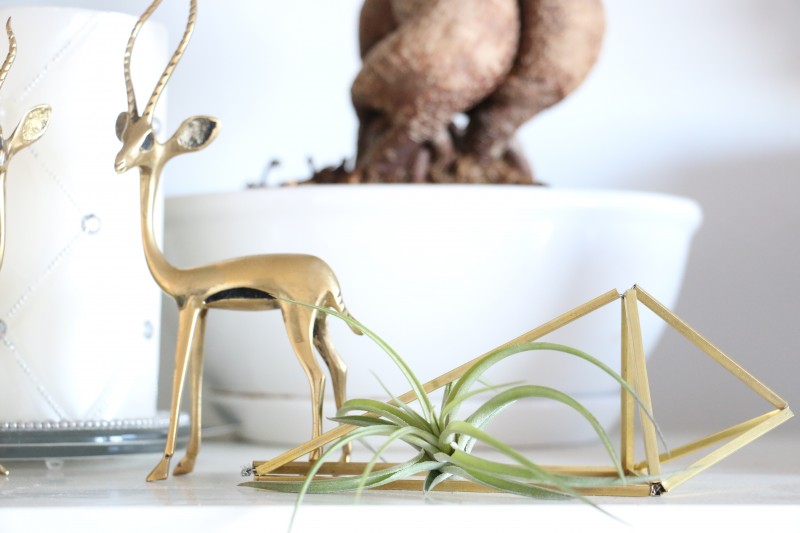
My sister was very pleased with her new airplants. We decided it would look better on her shelf instead of being mounted on the wall at her place. This is how they turned out.
Anyone tried their hands making a Himmeli sculpture? Share experiences or pictures below.
![]()
Barbara
Hi, I’m Barbara and I’m a little obsessed with house plants. I share my house plant adventures in the hopes of inspiring you to continue to enjoy the greens in your home. And if you have no plants (yet!) I hope this blog inspires you to add some green to your home. So go on! Try it! I think you might quite like it. And who knows? You may end up being … obsessed too.
Diy Succulent Planters Using Old Animal Figures - Miss Wish
[…] Himmeli Air Plant Holder (Green Obsessions) […]
27 . Oct . 2020Heidi
Wow, are himmelis in style now?! I’m from Finland and every grandma and granddad has at least one himmeli in their home. Himmeli is actually a Finnish word, although the origin of these ornaments is probably in Germany/Central Europe. Still amazing to see a such a strong part of my cultural heritage getting recognition outside the nation’s borders too!
20 . May . 2015– Heidi
Barbara
Yes Heidi. They are all the rage right now. Instagram and Pinterest are full of them so I thought I’d try my hand at one and it turned out pretty well. I didn’t know the origin of them at all so thanks for sharing!
20 . May . 2015